
Sourdough Bread for Beginners
Now that your sourdough starter is ripe and ready, the time has come to bake your first sourdough bread. This no-nonsense sourdough bread for beginners guide will teach you how to bake with confidence and will help you understand the basics of sourdough bread baking. I will start by listing the basic tools and equipment used in sourdough baking. Then I will explain some of the basic sourdough terminology and finally I will provide a recipe for a basic sourdough bread.

Before going straight to technicalities, three main points to keep in mind:
First: sourdough bread needs time. As excited as you may be to bake your first sourdough bread, the best thing you can do is to wait. Be patient. You need to allow the dough to be fully proofed before baking. Trust me, your patience will be fully rewarded. On the same note, timing is important. You may want to plan ahead and schedule your processes so that they fit within your everyday working pattern.
Second: be realistic! I know that we all want to get that airy, open crumb that we see all over instagram. In reality, achieving the perfect crumb takes a lot of practice and quite a significant investment in baking equipment. Understanding your environment, your sourdough starter and observing how the dough develops during kneading and resting periods may be difficult, but your knowledge will improve with each and every new bread that you make. You *will* get there. Eventually.
Finally: use any recipe (including the one below) as guidance only. The majority of recipes available online are most likely to work – to an extend. In reality, you might want to adjust the quantity of water (hydration), proofing (fermentation) time and even baking time – to suit your particular interpretation of the recipe. Even if you measure everything, time everything and religiously follow the recipe, there are still so many variables – most of which are almost impossible to control unless you work in a professional bakery or a bread baking laboratory. Also, there could be endless variations in the equipment/tools used during preparation/proofing/baking. So unless you can replicate *everything*, it’s almost sure that your bread won’t turn out exactly as in the pictures that accompany the recipe. To give you just two examples:
- a +/- 1% variation in the protein content of the flour can make a significant difference in kneading time, proofing time, hydration and final result.
- a +/- 5% variation in dough hydration may make the difference between an open crumb (that is a lighter, airy bread) and a close crumb (that is a denser bread)
Sourdough bread for beginners – tools & equipment
- working surface: wood, granite or marble working surfaces are ideal. Maintain your surface clean at all time and don’t use antibacterial/disinfectant wipes/substances right before handling the dough – they will kill all the bad bacteria, but also the good ones in your sourdough!
- dough scrapers: these are your best friends – you will use scrapers to handle the dough, to take it out of the bowl, to divide it and transfer it form from the working surface back to the bowl. Also to clean your working surface at the end. Get a small one and a slightly bigger one if you can.
- mixing bowls: various sizes of glass/clear plastic/stainless bowls are ok. I like the glass ones, but there’s a risk of accidental breaking so if you wish to be on the safe side, go for clear plastic or stainless steel.
- stand mixer: ideal, but not essential. In my first two years of making sourdough bread at home I didn’t had a stand mixer. So I had to knead by hand. It was more difficult and time consuming than just using a mixer. However, this experience has helped me understand the dough and has enabled me to learn how the gluten develops during kneading. It was a good and valuable experience.
- bannettons/proofing baskets: again – ideal, but not essential. Ideal because they are especially designed for bread making and they allow for the dough to ‘breathe’ during proofing. Not essential because alternatively you can use a mixing bowl or a large sieve lined with a well floured kitchen towel.
- baking steel/baking stone/bread cloche: recommended. I use a baking steel (which was quite an investment) which I permanently keep on the bottom shelf of my oven. The baking steel/baking stone maintains a high baking temperature underneath the dough. The baking cloche is usually placed on top of the dough in order to maintain the steam during baking. In the absence of a baking cloche, there are various ways to create steam in your oven. The easiest one is to keep a small oven-proof bowl and fill it with ice cubes just before baking.
- lame/scoring knives/grignettes: recommended. You use them to score your dough before baking. You could alternatively use a very sharp knife – but the final result will not be as good.
- baking peel: ideal but not essential. This is used to transfer your bread in/out of the oven.
- other: cooling rack, bread knife, kitchen towels, baking parchment, timer, thermometer
- oven: of course 🙂 Ideally, an electric oven with electronic display of temperature, fan function *and* steam function. You can make up for the lack of steam function by creating steam just before baking (see above). You can also make up for the lack of electronic temperature display by using an oven thermometer. The fan function can’t really be substituted by any ‘trick’, so you’ll have to make do without it. Or buy a new oven :)) Outdoor wood fired ovens are also ideal – for those who are lucky enough to have them.
Sourdough bread – terminology
- sourdough starter: this is your starting point in sourdough baking. It is ‘ripe’ and ready to use when it has been at least doubled in size after refreshing. It should be bubbly and wobbly and it should smell fresh, slightly acidic.
- starter hydration: this is the ratio of water to flour in your sourdough starter. Usually your starter will have a 100% hydration, meaning that equal quantities of water and flour are used to refresh and maintain your starter.
- starter refreshing ratios: you may have seen refreshing ratios such as 1:1:1 or 1:2:2 or 1:5:5 (and so on). The 1:1:1 ratio means that you have equal quantities of sourdough starter, flour and water. The 1:2:2 ration means that for each quantity of sourdough starter (i.e. 50g) you use double the quantity of flour (100g) and double the quantity of water(100g). The 1:5:5 ratio means that for each quantity of sourdough starter (i.e. 50g) you use five times the quantity of flour (250g) and five times the quantity of water(250g). These ratios are useful for when you have a small quantity of sourdough starter and you need to multiply it for your baking project.
- final dough/bread hydration: this is the ratio of water to flour in your final bread dough. A good starting point for beginners would be at around 70%-72%. This will give you a rather close crumb, that is a denser bread. A higher hydration would make the dough stickier and more difficult to handle – but this will lead to a more open crumb and a lighter bread.
- fermentation: sourdough (the starter, the dough and the final bread) is a fermented product. Fermentation is the result of the yeast and lactic acid bacteria activity, which gives the bread a lightly sour taste. The fermentation process is influenced by a number of factors such as the type of bacteria and yeasts present in the dough, but also hydration percentage, external temperature and humidity levels. The fermentation process (sometimes called proofing) could be fastened by increasing dough temperature (i.e. using warmer water) or increasing external temperature (i.e. heating the room by a few degrees Celsius). Similarly, the fermentation process could be slowed down by reducing the dough temperature (using slightly colder water) or by keeping the sourdough starter or the final dough in the fridge.
- autolyse: this is one of the first stages in preparing the dough. It is the process of mixing flour with water and leaving it to rest for periods varying from 45 minutes to 10-12 hours. There are various opinions regarding the utility (or lack thereof) of this step. The aim of this process is to enable the development of gluten in bread. Basically, the gluten begins to develop when the flour is mixed with water. As the flour gets hydrated, the gluten strains become more ‘elastic’, making the dough easier to handle during kneading. This stage is not essential, but I find it useful especially for kneading by hand.
- stretch and fold: is a ‘kneading’ technique widely used when working with sourdough. It reduces the kneading effort, while helping to strengthen the dough. The ‘stretch and fold’ technique (also known as ‘s&f’) is usually performed before the bulk fermentation (see below), while the dough is kept in the bowl. It basically means stretching the dough and folding it onto itself in order to create ‘tension’ in the dough.
- bulk fermentation: is the first proofing stage of your bread. This is usually done at room temperature. The duration for bulk fermentation at room temperature may vary from 3 hours to 5-6 hours, depending on the dough hydration, room temperature and humidity. During the bulk fermentation stage, the dough should at least double in volume.
- dividing: after the bulk fermentation, the dough is placed on the working surface and divided. If you only make one bread, there is obviously nothing to divide, so you should skip this step.
- degasing: during the bulk fermentation, as the dough has at least doubled in volume, gas bubbles have been forming. As you transfer the dough from the mixing bowl to the working surface, you need to release the gas by gently pressing the dough with your hand – this will give you an even crumb during baking.
- pre-shaping: this is an intermediate stage where you roughly give your dough the desired shape and then leave it to rest on the working surface for abut 10 minutes. This will relax the gluten structure and will make the dough easier to shape.
- shaping: is the technique of forming the final dough. You can shape the dough into a boule (round shape) or batard (oval shape). After you have shaped the dough, you will transfer it into the bannetton/proofing basket for the final proofing stage.
- final proof (fermentation): this can be done either at room temperature (approx 3-5 hours – again, depending on room temperature) or you can place the dough in the fridge for a longer fermentation (12-18 hours). The dough is ready to be baked when it has at least doubled in size, it is slightly wobbly and if you gently press it with your finger it will quickly spring back and there will be no indentation left.
- scoring: means slashing the dough with a sharp blade in order to allow it to expand during baking. You need a sharp blade for this – so be aware of safety risks when using it.
The following recipe is for a small bread made with organic strong white flour and a mix of organic rye + spelt flour. It has a 70% hydration so the dough should be fairly easy to handle. If you don’t have rye + spelt flour mix, you can replace it with the same quantity of any of the following types of flour: wholemeal, rye, spelt, malted. However, given how difficult it may be to find specialty flours these days, using just white strong flour will work just as well. Organic is recommended but not essential. Just make sure to refresh your sourdough starter using the same type/types of flour that you intend to use in your final bread.

Sourdough Bread for Beginners
Ingredients
Prepare your sourdough starter for baking:
- 50 g sourdough starter 100% hydration
- 40 g strong white flour organic, 13.4% protein
- 10 g mixed rye + spelt flour organic
- 50 g water filtered or bottled, room temperature
Ingredients for the final dough:
- 150 g sourdough starter (see above) 100% hydration
- 345 g strong white flour organic, 13.4% protein
- 55 g mixed rye + spelt flour organic
- 280 g water filtered, room temperature
- 12 g salt
Instructions
Day 1 (morning)
- Prepare your sourdough starter: take 50g of your original starter, put it in a separate jar and mix it with 40g white flour, 10g (rye + spelt) flour and 50g water. Allow it to at least double in size (3-4 hours).

- NOTE: continue to refresh the reminder of your original sourdough starter as per your usual schedule.
Day 1 (afternoon)
- Place the flour (345g white and 55g rye+spelt) and water (280g) in a large bowl and mix it using a wooden spoon or a spatula until the water is fully incorporated into the flour. Cover with cling film and leave 1 hour for autolyse.
- Add the sourdough starter and gently knead it by hand into the four & water mix. Cover with cling film and allow it to rest for 30 minutes.
- Add the salt and knead by hand or using a stand mixer until the gluten is fully developed.(see notes)

- Leave the dough in the mixing bowl, cover with clig film.
- Perform 3 sets of stretch and fold, straight into the bowl, at 45 minutes intervals. This will help strenghten the gluten bonds.
- After the third set of stretch and fold, leave the dough to proof at room temperature for at least 3 hours or until it has at least doubled in volume.
- Take the dough out on a lightly floured surface. Degase, preshape and allow to rest for 10 minutes.
- Prepare the banneton by lining it with flour. If you're using a proofing basket/sieve/bowl you might want to line it with a well floured kitchen towel.
- Shape the bread and place it into the banneton/proofing basket. Cover with a clean kitchen towel and place it in the fridge to proof overnight.

Day 2 (morning)
- Preheat the oven at 240C (fan) with the baking stone/baking steel/ baking cloche in, on the lower shelf. Place a small ovenproof dish at the back.
- Take the bread out of the fridge, turn it over on to a baking peel, score it and transfer it to the oven. Add a few ice cubes into the ovenproof dish to create steam.

- Bake at 240C for 20 minutes, then lower the temperature to 220C, open the oven door to release all steam and continue baking for another 20-25 minutes.
Notes
I am also working on a Sourdough bread – FAQ blog post, so feel free to ask any questions and I will do my best to provide you a detailed answer. I will update this post with a link to the FAQs as soon as it will be published.
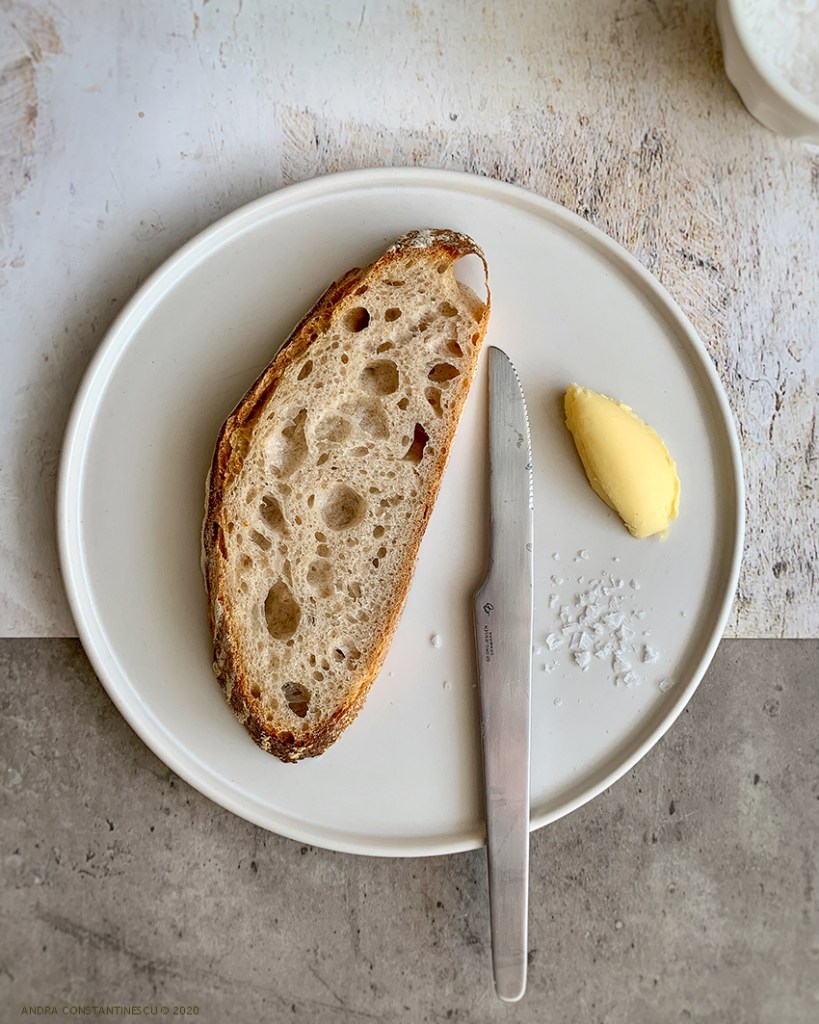
If you’re planning to bake your own bread, why not try making your own home made butter as well? It’s easier than you might think. Click here for the recipe.
For more recipes and foodie inspiration follow me on Instagram at @mintandrosemary.
If you’re looking for new kitchen tools or gadgets, head over to my Amazon Influencer page for a list of carefully curated tools, utensils and cookery books – there’s also a special section for sourdough essentials. Do feel free to drop me a line if you have any questions, or if you’re looking to get a new kitchen tool/utensil/gadget. I’ll be happy to help!
Disclosure: as an Amazon Associate, I earn a fee from qualifying purchases.

Spaghetti with Prawns

You May Also Like
Summer recipe: spicy tomato soup [*vegan]

Greek Yogurt with Strawberries and Sichuan Pepper
